


How to make a Budgie Nest box? Building a budgie nest box is an easy and entertaining DIY activity. Whether you want to do a budgie breeding or you simply have a domestic budgie, you can easily build a pleasant habitat. With the right tools, you can build a home that your budgie will love.
Prepare the material
Find wooden planks
The nest box must be made of wood, as budgies love to chew and they would quickly destroy a cardboard box. To build a nest box, buy wooden planks at a DIY store.
- Plywood plates are the most effective.
- You need plates with a thickness of at least 1.5 to 2 cm, but they can be thicker.
- Cut the wood into four pieces of 30 x 35 cm and two pieces of 35 x 35 cm. In total, this amounts to about 0.7 m2, so buy at least this amount of wood to be sure to have enough.
Get the tools you need
It takes a few tools to build the nest box so if you don’t already have them, buy them from a DIY store.
- A circular saw: if you do not cut the wood to the right dimensions in the store, you will have to do it yourself. The best tool for cutting clean and straight edges is a circular saw.
- A saber saw: this mechanical saw is equipped with a long thin blade for cutting holes. You will need it to cut a circular entrance in the nest box.
- An electric drill: it will be necessary to drill a few holes to assemble the nest box. The easiest and fast way is to use an electric drill.
- A hammer: you will have to nail the nest box to assemble it so you will need a hammer. Also, consider buying nails.
- A graduated ruler or tape measure: you will need it to correctly measure the wood to be cut.
Purchase the necessary protective equipment
Never use a power tool without proper protection. To ensure your safety, you should obtain certain protective items before you begin.
- Eye protection: Safety glasses are a must when using a saw or electric drill. Debris can be thrown into your eyes and hurt or hurt you.
- Ear protection: Power tools make noise and if your ears are exposed to them for a long time, you can have hearing problems. Use earplugs or special noise-canceling headphones to avoid hearing problems.
- Gloves: When working with wood, you could cut yourself or take a splinter. Minimize the risk of injury by wearing thick protective gloves.
- A dust mask: When you use the saw and drill, you will produce sawdust that could seep into your lungs and irritate them. Wear a mask safety is a priority to protect your lungs.
Building the nest box
Cut the wood to the right dimensions
You can have it cut in the store where you buy it or cut it yourself. If you cut it, cut out four pieces of 30 x 35 cm for the sides of the nest box and two pieces of 35 x 35 cm for the lid and bottom.
- Be sure to measure the wood well before cutting it. Use a carpenter’s pencil to mark the wood to cut straight and precise edges. If you make a mistake, you may have to go back to the DIY store to buy wood, which will cost you money and time.
Cut out a circular opening on one side
This will be the entrance to the nest box. Use the saber saw to cut a circular hole with a circumference of 8 cm in one of the sections that will form the sides. Cut it near the bottom of the nest box so that the bird can simply enter while walking.
- The formula for determining the circumference of a circle is pi (3.14) x the diameter. For a circumference of about 8 cm, a diameter of 2.5 cm is required.
Nail the sides to the bottom of the nest box
The most convenient is to build a nest box with a lid that comes off, as you will be able to clean it more easily. Don’t put the lid in place right away.
- Nail all four sides together. Push one nail into the bottom corner and one into the top corner on each side.
- Nail the bottom to the walls by driving a nail into each corner.
- Make sure the nails stay straight when you push them in, otherwise they will shift and could pierce the inside of the nest box. If this happens, pull out the nail and start again.
Attach a perch under the entrance outside the nest box
Drill holes to secure the lid
A simple way to make a lid that comes off is to hold it in place with wire. You just need to drill a few holes it’s very important.
- Start by drilling two holes on the left side and two on the right side of the nest box. Drill corresponding holes in the lid.
- Put the lid on the nest box and run the wire through the holes.
- Tie the wire to hold it in place. Simply detach the wire to remove the cover whenever you want.
Decorate the bottom of the nest box
Type of budgie nest
You can make two different types of nests: the classic nest built with plywood or the natural nest in a tree trunk. We will see in detail how to make its two nests.
The plywood nest
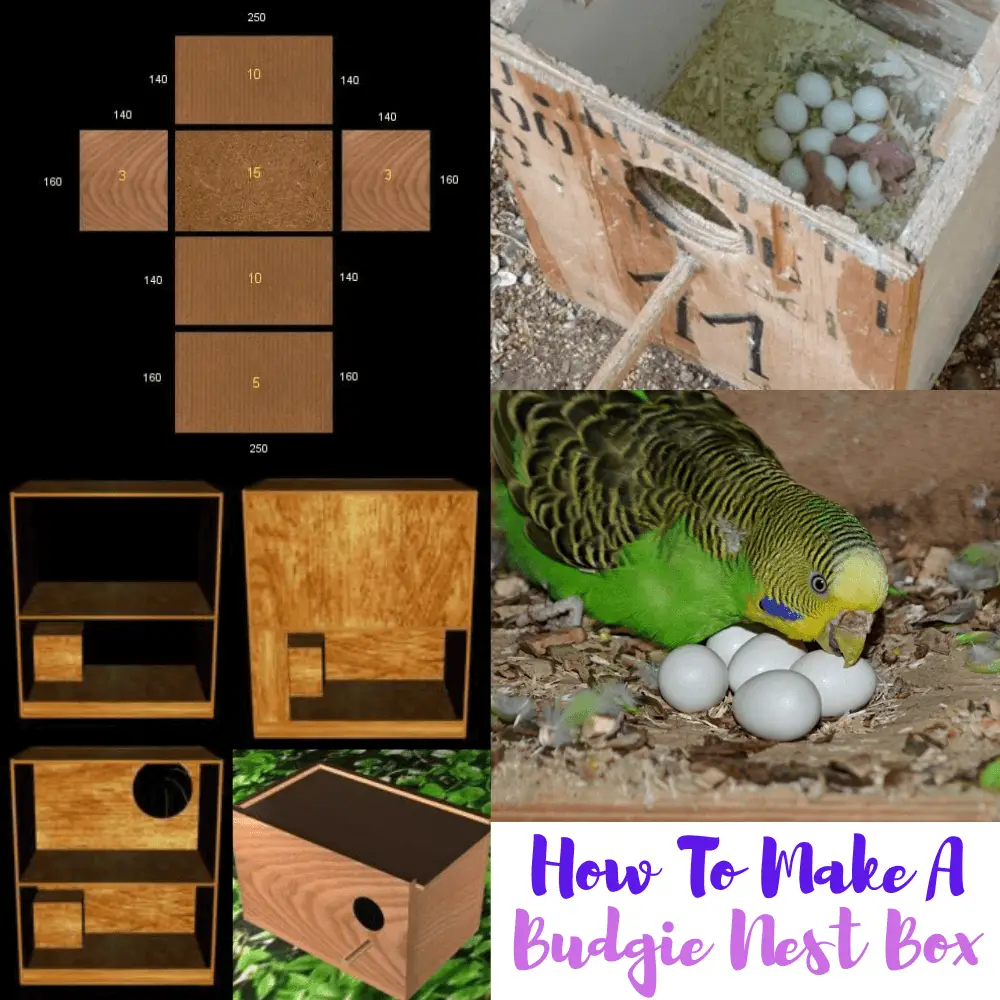
In order to make a nest for Wavy Parakeets, Catherines, and Euphemies, The following pieces of wood are required:
| Number of songs | Thickness | Type | Size |
| 2 | 3 mm | Side | 160*140 mm |
| 2 | 10 mm | Front and back | 250*140 mm |
| 1 | 15 mm | Bottom | 250*160 mm |
| 1 | 5 mm | Top | 250*160 mm |
How to make a Budgie Nest box
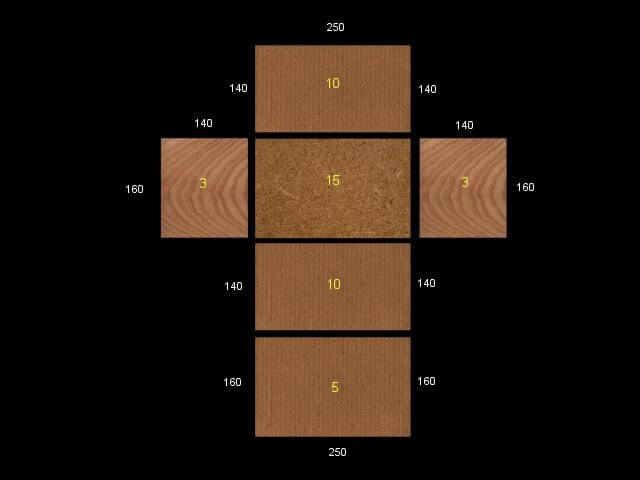
The dimensions are the numbers in white and mm. The numbers in the center of each piece correspond to the thickness of the wood.
Create a small cavity in the bottom piece so that the bird can deposit on it his eggs. Assemble the front and back faces with the bottom using small nails. After, fix the two sides in the same way. Close the lid either by putting it on simply or by fixing two small hinges ( in order to see the inside of the nest if there are young chicks )
Make a hole on the front side to make the entrance to the nest. ( about 7cm from the right and 5cm from the top)
The diameter varies depending on the size of the bird:
- 4.5 cm for parakeet budgies
Then make a hole the size of a branch so that the bird can land there for entering the nest (about 7cm from the top always on the front side.)
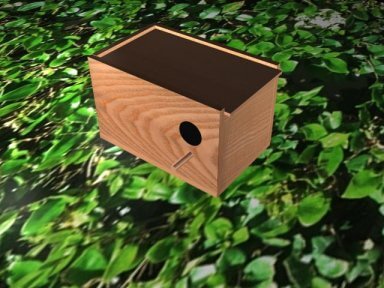
The end result looks something like this:
How to make a Budgie Nest box
Nest plywood Version 2002
However, over the years, a breeder AMI tried a new compartment nest. This has the advantage of not Scaring the bird when you go to control the young. Here are the steps for Construction:
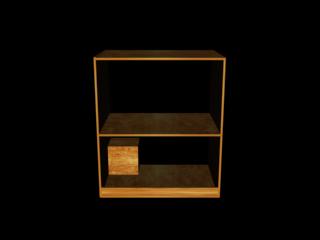 Made a box of about 285x330mm. Separate this box in half equally.
On the lower part, add A small edge of 4cm so that when you open it, the chips of wood do not fall outside the nest.
In the background left, add a piece of wood so that the bird can come out of the most important part bass of the nest. Also made above the wood in question a hole of 50×50 for the passage of the bird.
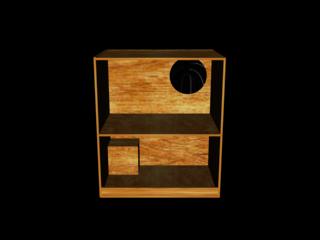 In The upper part, make a hole on the back part of the nest of about 5cm diameter.
This will serve as a hole to get the bird out. Also, remember to put a small piece of wood to act as a perch.
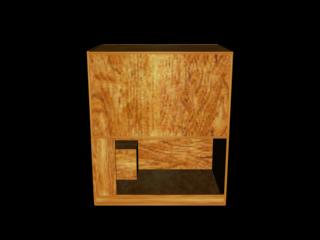 Then Closed the upper front part with a small hook fixed on the sides of the nest so that the upper part can be opened in the event that a bird would have to die there.
In the lower part, on the left, about 1/4 of the length, fixed a fixed wooden part. The complementary part will be fixed to the left with a hinge and to the right by a hook.
That way, when you go to open it, You remove the hook and gently open the nest. The bird will climb one floor and will let you control the young people.
Warnings
- If the bird does not want to enter the nest box, do not force it. Let him get used to it.
How to make a Budgie Nest – BUDGIE BREEDING & Budgie Nest Box
SOURCE:Alen AxP